


![[Front & Rear] Brake Disc Rotors & Ceramic Pads for Acura TL 2004 - 2008](https://i.ebayimg.com/thumbs/images/g/4w8AAOSwKQ9aDPo1/s-l225.jpg)


![[Front Kit] Geomet Disc Brake Rotors & Ceramic Pads for Acura TL 2009 - 2014](https://i.ebayimg.com/thumbs/images/g/cF0AAOSwZqZaDQG3/s-l225.jpg)

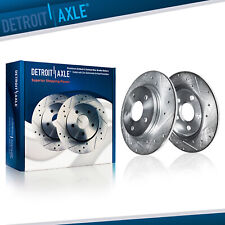


Acura TL Discs, Rotors, and Hardware
Driving your Acura TL vehicle with faulty brakes is not an option. Fortunately, there is a variety of Acura TL discs, rotors, and hardware to allow you to replace your brakes and drive safely. Never hesitate to get your Acuras brakes fixed or replaced.
What is the difference between discs and rotors?Brake discs and rotors are the same. When you press down on the brake pedal, the brake pads grip them and stop them from turning, which in turn stops your Acura’s wheels. This is very much what happens to a bicycle when the brakes grab the wheel directly and stop it. How long disc rotors last depends on how much and how hard you drive. Some brakes last for 70,000 miles, while others have to be changed after one third of that.
How are disc rotors put together?They are made of a disc placed between two calipers. The calipers hold one or more pistons that are forced into the disc by the brake fluid that is supplied by the brake lines. The brake pads are found between the disc and the pistons. Disc brakes have an advantage over the drum brakes that used to be found on cars, because they are not at such high risk for overheating or becoming waterlogged.
Are there different kinds of disc brakes?There are basically two different kinds of brakes and rotors for the Acura TL model. They can be either drilled or slotted. The drilled brake rotors have holes that keep the rotor from overheating. Too much heat causes the vehicles discs to become less efficient. If your Acura is an earlier model, the holes also prevent gas from building up between the discs and the brake pads. Gas also makes the rotor less efficient and lowers its stopping power. The holes also make the rotor less susceptible to water interfering with the rotors efficiency and power. Slotted rotors do the same thing as drilled ones, except they have slots that take away the excess water, heat, and gas.
Can you install new disc brakes yourself on your sedan?You can install new disc rotors and brake pads yourself if you have the proper tools. You will need to hoist up the car and remove the tire. Take off the screws in the rotor. This is best done with an impact tool with a heavy mallet. Remove the nut on the bottom of the caliper. Take off the bracket holding the brake line to make more room, then take off the caliper. Check the rubber boot to make sure that it is still sound. If it’s not, it should be replaced as well.
Remove the brake pads. Slide out the caliper by pulling back the rubber boot. Then, suspend the caliper with a bungee cord or something else to support it. Remove the caliper bracket, and take the rotor off. Then, install the new rotor. Replace all components, check the fluid level in the master cylinder, check the brake petal, and replace the tire.